Topic area and perimeter project: Discover exciting and educational area and perimeter projects that enhance students' understanding through hands-on activities. From designing zoos and building cities to creating kites and playing engaging games, these projects make learning math both fun and practical. Perfect for teachers and students seeking interactive ways to explore these essential geometric concepts.
Table of Content
- Area and Perimeter Project Ideas
- Introduction to Area and Perimeter
- Understanding the Concepts
- Project Ideas and Activities
- Design a Zoo
- Haunted House Project
- Interactive and Hands-On Activities
- Using Manipulatives
- Geoboards and Graph Paper
- Task Card Scoots
- Interactive Notebooks
- Measurement and Data Centers
- Real-Life Applications
- Student Engagement and Creativity
- Project-Based Learning (PBL)
- Resources and Materials
- Evaluation and Reflection
- YOUTUBE: Xem video về Mô hình làm việc về công thức chu vi và diện tích - Mô hình làm việc toán - Tự làm | Craftpiller để hiểu cách áp dụng diện tích và chu vi trong thực tế.
Area and Perimeter Project Ideas
Engaging students in learning area and perimeter can be made fun and interactive through various creative projects and activities. Below are some detailed and innovative project ideas to help students grasp these mathematical concepts.
1. Design a Zoo
In this project, students use their knowledge of area and perimeter to design a zoo. They need to plan and accommodate animals, considering the space each animal needs. This project integrates geometry skills and basic algebra.
| Grade Level | 7-12 |
|---|---|
| Duration | 3-4 Days |
| Concepts | Area, Perimeter, Irregular Figures, Scale |
2. Area and Perimeter Robot
Students create a robot using graph paper, adhering to given area and perimeter measurements. This activity helps in understanding how different shapes with the same perimeter can have different areas, and vice versa.
- Lower-level students focus on area measurements.
- Advanced students focus on perimeter measurements.
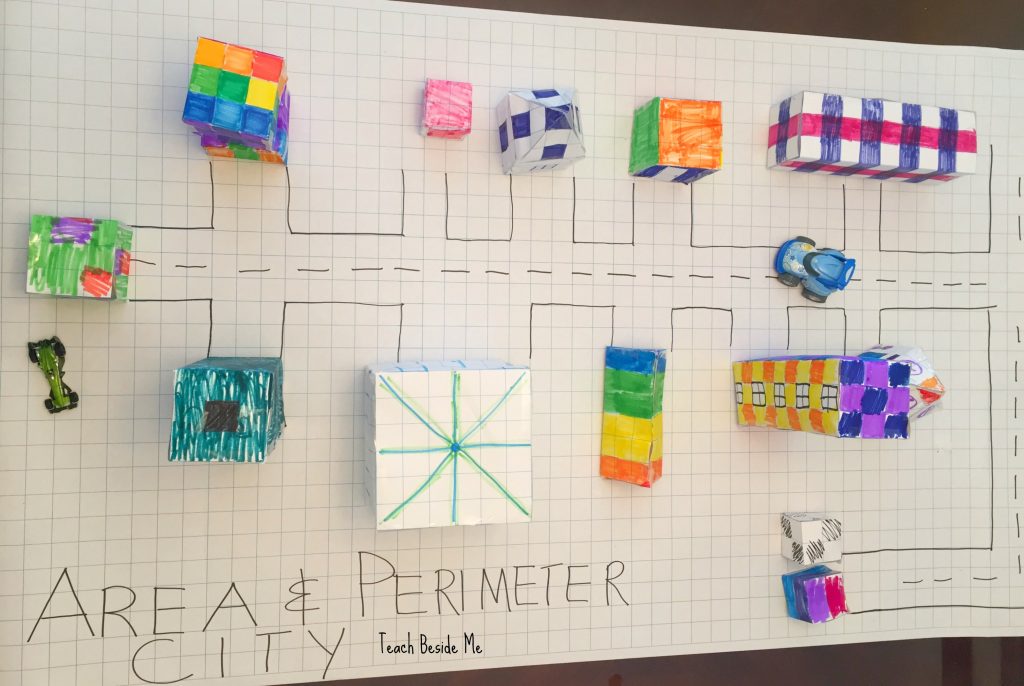
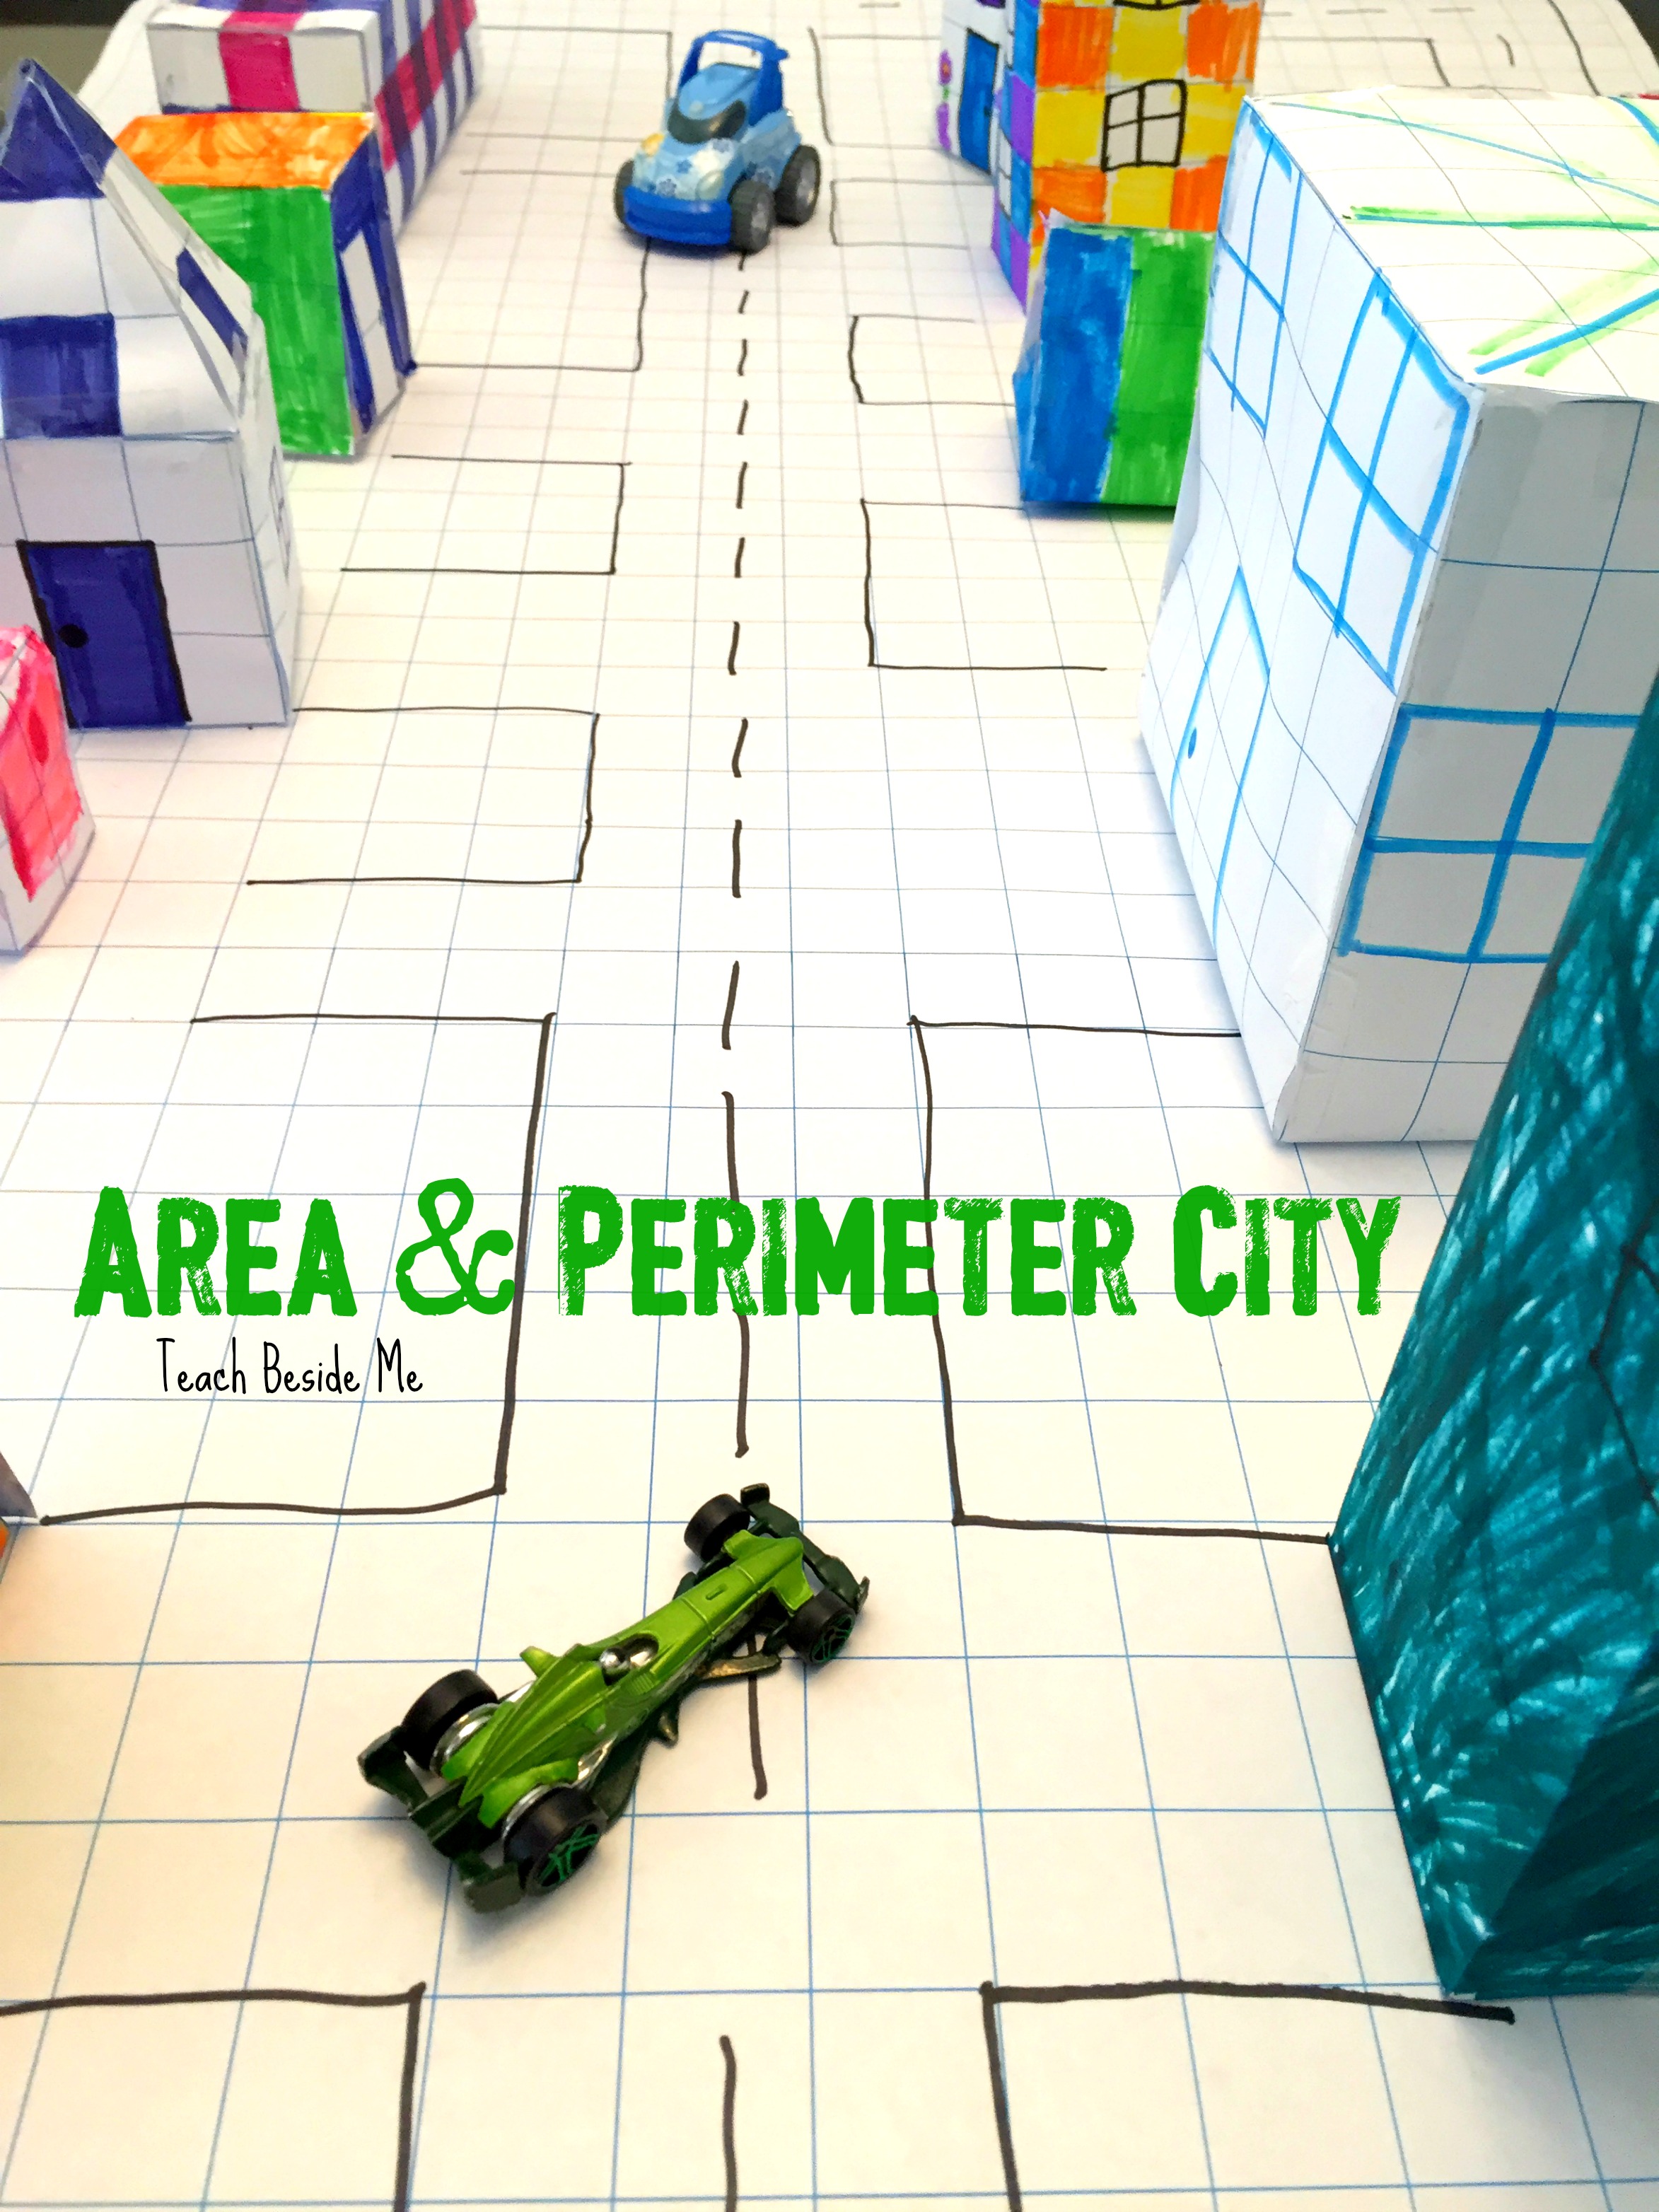
3. Build a City
Students collaborate to build a model city, calculating the area and perimeter of each building. This project also introduces the concept of volume, making it a comprehensive exercise in spatial reasoning and geometry.
4. Interior Designer Project
Students take on the role of interior designers, arranging furniture within a given space. They must calculate the area and perimeter of the room and the furniture, ensuring everything fits perfectly. This project emphasizes real-life applications of math.
5. Floor Tiles Activity
Using square floor tiles and painter’s tape, students create various shapes on the floor and then calculate their areas and perimeters. This hands-on activity is both engaging and educational.
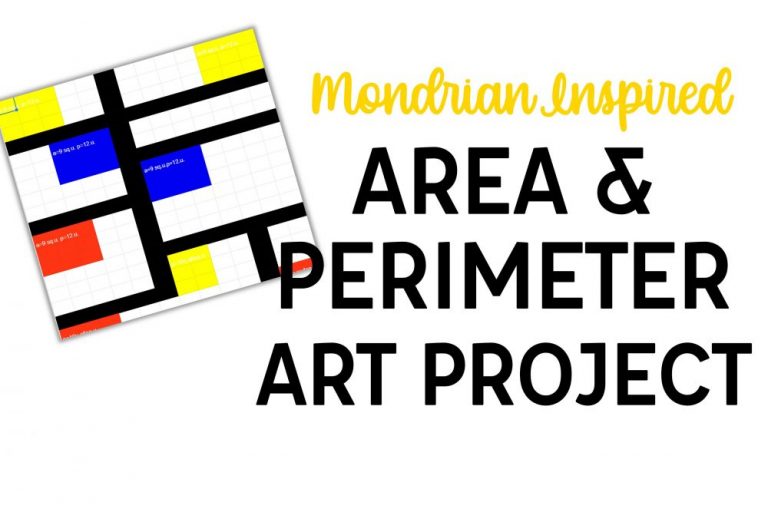
6. Name Art
Students draw their names on grid paper and then calculate the area and perimeter of the letters. This activity combines creativity with mathematical practice.
7. Kite Building
Students build kites and measure their areas and perimeters. This project culminates in flying the kites, adding a practical and enjoyable dimension to learning geometry.
8. Island Conquer Game
In this game, students draw rectangles (islands) on a grid, calculate their areas and perimeters, and compete to have the largest total island area.
9. Geoboards
Students create shapes using bands on geoboards and then calculate the area and perimeter of the shapes. This tactile activity aids in understanding geometric concepts through hands-on learning.
10. Interactive Notebooks
Using interactive notebooks, students complete various tasks related to area and perimeter. These activities are differentiated to meet diverse student needs.
11. Scoot Activity
Students measure pieces of wrapping paper around the classroom to determine their area and perimeter. This activity is interactive and incorporates movement, making it enjoyable for students.
12. Pentominoes
Students use pentomino blocks to create shapes on grid paper and calculate the area and perimeter of each shape. This activity reinforces spatial awareness and geometric understanding.
These projects not only help in understanding mathematical concepts but also develop problem-solving skills and creativity among students.
READ MORE:
Introduction to Area and Perimeter
Understanding the concepts of area and perimeter is essential in geometry. These two measurements help us determine the size and boundaries of different shapes. Whether you are calculating the space inside a classroom, designing a garden, or even planning the layout of a zoo, mastering these skills is crucial.
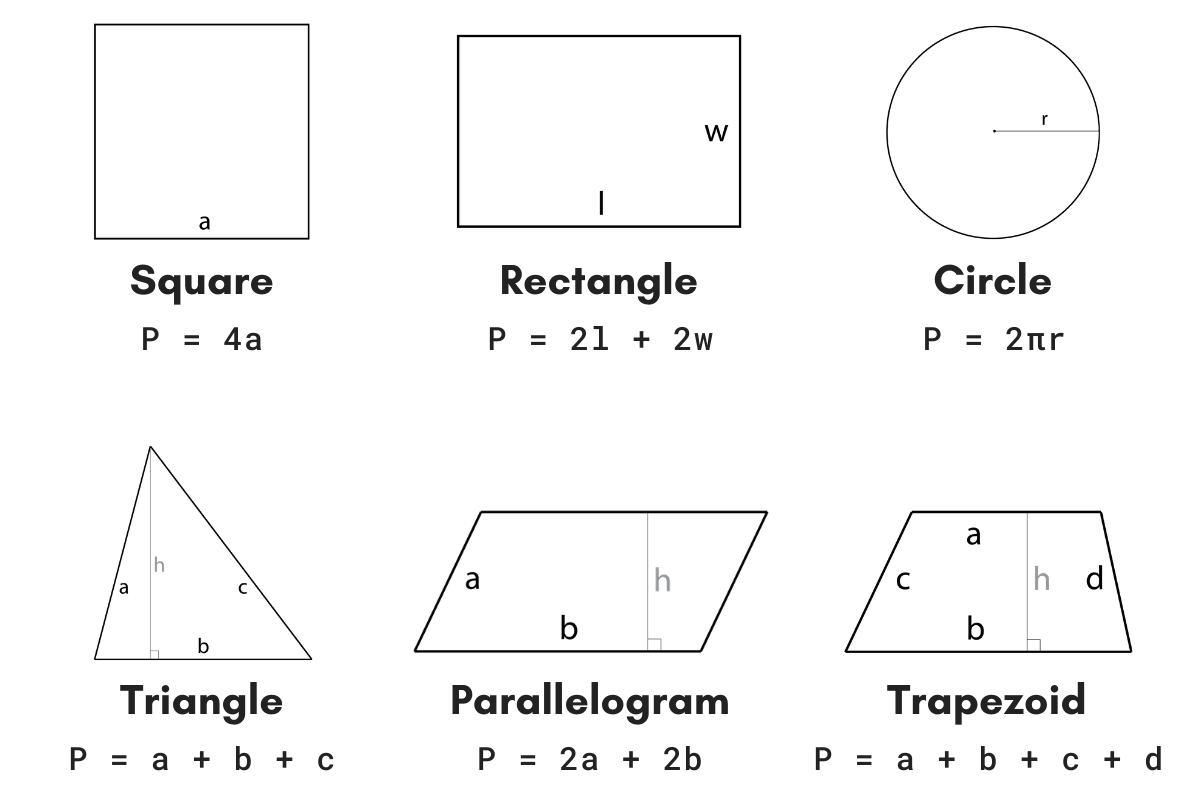
Area refers to the amount of space inside a two-dimensional shape. It is measured in square units. To calculate the area of a rectangle, use the formula:
\[ \text{Area} = \text{Length} \times \text{Width} \]
Perimeter, on the other hand, is the total length of all the sides of a shape. It is measured in linear units. The formula to calculate the perimeter of a rectangle is:
\[ \text{Perimeter} = 2 \times (\text{Length} + \text{Width}) \]
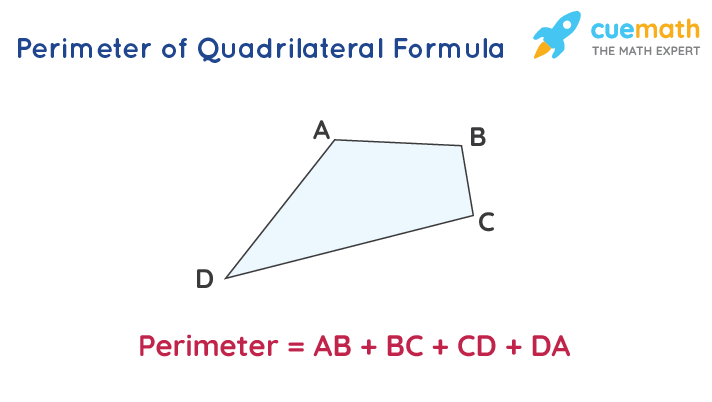
These basic formulas can be extended to other shapes, such as triangles, circles, and irregular polygons, using appropriate modifications.
Here are some key concepts and activities to help you understand and apply area and perimeter in various projects:
- Using grid paper to visualize and calculate the area and perimeter of different shapes.
- Creating real-life projects like designing a zoo or a garden to apply these concepts practically.
- Engaging in classroom activities such as building models or playing educational games to reinforce these skills.
With practice, you'll find that these mathematical concepts become intuitive and highly useful in both academic and everyday contexts.
Understanding the Concepts
Area and perimeter are fundamental concepts in geometry that help us understand the size and boundaries of different shapes. Here, we break down these concepts and explore their practical applications.
Definition of Area and Perimeter
The area of a shape is the amount of space it occupies on a flat surface. It is measured in square units. For example, the area of a rectangle is calculated by multiplying its length (\(l\)) by its width (\(w\)), as shown in the formula:
\[
\text{Area} = l \times w
\]
The perimeter is the total length of all the sides of a shape. It is measured in linear units. For a rectangle, the perimeter can be calculated by adding together the lengths of all four sides, as shown in the formula:
\[
\text{Perimeter} = 2l + 2w
\]
Real-Life Applications
Understanding area and perimeter is crucial in many real-life scenarios. Here are a few examples:
- Interior Design: When designing a room, knowing the area helps in choosing the right size of furniture and flooring materials.
- Construction: Builders need to calculate the perimeter to determine the amount of materials needed for framing and fencing.
- Landscaping: Gardeners use these measurements to plan the layout of gardens and determine the amount of soil and plants required.
Interactive Learning Activities
Here are some engaging activities to help students understand and apply these concepts:
- Geoboards: Students can create shapes using elastic bands on a geoboard and calculate their area and perimeter.
- Design a Zoo: Students create a blueprint for a zoo, maximizing the number of animal exhibits within a given area and perimeter constraints.
- Build a City: Students work together to design a city layout, calculating the area and perimeter of different buildings and spaces.
- Board Games: Games like Connect Four and custom board games involving area and perimeter problems can make learning fun and competitive.
Project Ideas and Activities
Engaging students in area and perimeter projects can make learning these concepts fun and practical. Here are some creative project ideas and activities to incorporate into your lessons:
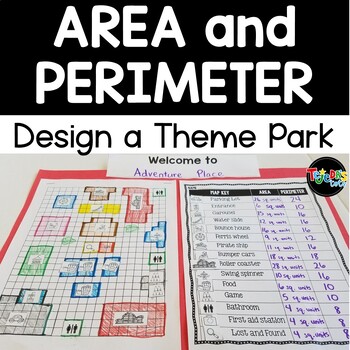
- Design a Zoo: Students create a blueprint for a zoo, aiming to include the maximum number of exhibits while adhering to specified area and perimeter guidelines. This project helps them apply mathematical concepts in a real-world context while fostering creativity and problem-solving skills.
- Geoboards: Use geoboards and rubber bands to form various shapes. Students calculate the area and perimeter of these shapes, then swap with a partner to solve their shapes. This hands-on activity reinforces geometric understanding and spatial reasoning.
- Scoot Activity: Set up a scoot game where students move around the classroom measuring the area and perimeter of different objects. This can include themed wrapping paper pieces to add a fun, festive element.
- Interactive Notebooks: Incorporate area and perimeter activities into interactive notebooks. Differentiated tasks ensure all students are engaged, working at their own level while completing visually similar activities.
- Playground Design: Students design a playground, calculating the area and perimeter of different equipment spaces. This project integrates creativity with precise mathematical calculations, resulting in a practical application of the concepts.
- Candy Measurement: Use different-sized candy boxes to teach perimeter and area. Students measure the boxes and rotate through stations, providing a sweet incentive for learning.
These activities not only make learning about area and perimeter engaging but also help students see the practical applications of these mathematical concepts in everyday life.
Design a Zoo
Designing a zoo is a creative and educational project that integrates various math concepts such as area, perimeter, and geometry. Students will plan, design, and create a zoo layout, ensuring that each animal exhibit meets specific spatial requirements. This project not only enhances mathematical skills but also fosters creativity and problem-solving abilities.
Steps to Design a Zoo
- Introduction and Planning: Begin by introducing the project and discussing the importance of zoos. Provide students with an overview of what they will be doing, including learning objectives and project outcomes.
- Research and Selection: Students research different animals and their habitat requirements. They select a variety of animals to include in their zoo, considering the space each animal needs.
- Layout Design: Using graph paper or digital tools, students draw a layout of the zoo. They must calculate the area and perimeter of each exhibit, ensuring it fits within the overall zoo plan. Encourage students to think about pathways, visitor areas, and other facilities.
- Calculation and Adjustment: Students calculate the total area and perimeter for each exhibit and adjust their designs to optimize space. They may need to revise their layouts to ensure all exhibits fit within the designated space.
- Final Presentation: Students present their zoo designs to the class, explaining their layout, calculations, and the reasoning behind their choices. This can include a digital presentation or a physical model of the zoo.
Materials Needed
- Graph paper or digital design software
- Rulers and calculators
- Research materials on various animals
- Markers, colored pencils, or design software for creating the final layout
- Presentation tools such as posters or slideshows
Assessment and Evaluation
Assessment can be based on the accuracy of calculations, creativity of the design, and the ability to meet project requirements. A scoring rubric can be used to provide detailed feedback on various aspects of the project, including mathematical accuracy, design creativity, and presentation skills.
This project not only helps students practice important math skills but also engages them in a real-world application, making learning both fun and meaningful.
Haunted House Project
The Haunted House Project is a creative and engaging way for students to apply their understanding of area and perimeter in a Halloween-themed activity. This project is designed to be both fun and educational, allowing students to design their own haunted house and calculate the area and perimeter of each room within it. The project integrates math skills with creative design and critical thinking.
- Project Overview: Students will design a haunted house, ensuring they calculate the area and perimeter of each room accurately. This project combines geometry with creative planning.
- Materials Needed: Grid paper, rulers, calculators, and art supplies for decorating the haunted house.
- Step-by-Step Process:
- Planning: Students will begin by planning their haunted house layout on grid paper, deciding on the number of rooms and their sizes.
- Calculations: For each room, students will calculate the perimeter and area using appropriate mathematical formulas.
- Design: Once the calculations are complete, students will draw their haunted house on grid paper, labeling each room with its dimensions.
- Reflection: After completing the design, students will reflect on their work, considering any challenges they faced and how they overcame them.
- Additional Activities: Students can create advertisements for their haunted house, write spooky stories set in their haunted house, or even build 3D models of their designs.
- Learning Outcomes: This project helps students understand the practical applications of area and perimeter, enhances their problem-solving skills, and encourages creative thinking.
Interactive and Hands-On Activities
Engaging students in interactive and hands-on activities is crucial for enhancing their understanding of area and perimeter concepts. Here are some exciting ideas:
- Create a "Build Your Own City" project where students design and construct a miniature city using cardboard, rulers, and other materials. They can calculate the area and perimeter of each building and road.
- Organize a "Math Carnival" where students participate in various math-themed games and challenges, such as a "Ring Toss" game to practice calculating perimeter and a "Shape Maze" to explore area concepts.
- Set up a "Math Escape Room" where students work in teams to solve area and perimeter-related puzzles and unlock clues to "escape" the room.
- Implement "Math Centers" with hands-on activities like tangrams, pattern blocks, and geoboards to allow students to explore geometric shapes and measurements independently.
- Utilize technology by incorporating interactive apps and websites that offer virtual manipulatives for students to visualize and manipulate geometric figures and calculate their areas and perimeters.
Using Manipulatives
Manipulatives are valuable tools for helping students grasp abstract mathematical concepts related to area and perimeter. Here are some effective ways to incorporate manipulatives:
- Provide students with pattern blocks or tangrams to explore how different shapes can be combined to form larger shapes, helping them understand the concept of area composition.
- Use interlocking cubes or snap cubes to build rectangles and squares, allowing students to physically manipulate the shapes to visualize their dimensions and calculate their areas.
- Introduce geoboards with rubber bands to create various polygons, enabling students to experiment with different side lengths and arrangements to determine the perimeter of each shape.
- Utilize string or yarn to outline shapes on the floor or classroom walls, allowing students to physically walk around the perimeter of the shapes to measure and compare lengths.
- Incorporate everyday objects like paper clips, coins, or tiles to estimate and measure the perimeter of irregular shapes, promoting real-world connections to mathematical concepts.
Geoboards and Graph Paper
Geoboards and graph paper are fantastic tools for engaging students in hands-on exploration of area and perimeter. Here's how you can use them effectively:
- Provide students with geoboards and rubber bands to create various polygons and shapes. Encourage them to measure the lengths of the rubber bands to calculate the perimeter of each shape.
- Use graph paper to draw grids and guide students in sketching different shapes with specific dimensions. They can count the squares inside each shape to determine its area.
- Challenge students to design their own geometric patterns on geoboards or graph paper, incorporating concepts of symmetry, congruence, and area-to-perimeter ratios.
- Introduce coordinate geometry by having students plot points on graph paper to create polygons. They can then calculate the lengths of the sides and the area of the shapes using the coordinates.
- Incorporate geoboard or graph paper activities into collaborative projects where students work in teams to design and analyze geometric figures, fostering peer learning and problem-solving skills.
Task Card Scoots
Task Card Scoots are engaging activities that get students moving while practicing their skills in area and perimeter. Here's how you can organize one:
- Create task cards with different area and perimeter problems, including a variety of shapes and scenarios.
- Place the task cards around the classroom or outdoor area, ensuring each card is easily accessible.
- Divide students into small groups and provide each group with a recording sheet to write their answers.
- Set a timer and instruct students to move around the room, solving the problems on the task cards and recording their answers on the recording sheet.
- Encourage collaboration and discussion among group members as they work through the problems together.
- Once the timer is up, gather the students and review the answers together as a class, providing explanations and addressing any misconceptions.
- Reward students for their participation and effort, emphasizing the importance of teamwork and problem-solving skills.
Interactive Notebooks
Interactive notebooks are dynamic tools for students to actively engage with area and perimeter concepts. Here's how you can incorporate them effectively:
- Have students create a dedicated section in their notebooks for area and perimeter activities, organizing their notes and assignments in a structured manner.
- Include foldable templates for different types of shapes, such as rectangles, triangles, and circles, where students can record formulas, examples, and practice problems.
- Encourage students to personalize their notebooks by adding colorful diagrams, drawings, and real-life examples related to area and perimeter.
- Provide interactive tasks like matching games, flipbooks, and interactive quizzes that students can complete directly in their notebooks to reinforce key concepts.
- Incorporate reflective prompts and self-assessment activities where students can evaluate their understanding of area and perimeter topics and set goals for improvement.
- Use interactive notebooks as a tool for formative assessment, allowing you to monitor student progress and provide timely feedback on their work.
- Encourage students to share and discuss their notebooks with classmates, promoting collaboration and peer learning in the classroom.
Measurement and Data Centers
Measurement and data centers provide students with hands-on experiences to explore area and perimeter concepts through real-world applications. Here's how to set up an engaging center:
- Create stations within the measurement and data center, each focusing on a different aspect of area and perimeter. Examples include:
- A station for measuring and comparing the dimensions of various objects using rulers, tape measures, and other measuring tools.
- An area station where students use square tiles or grid paper to calculate the area of different shapes and surfaces.
- A perimeter station where students measure the lengths of boundaries using measuring tapes or strings.
- Provide manipulatives and materials at each station, such as pattern blocks, geoboards, graph paper, and real-life objects, to facilitate hands-on exploration and experimentation.
- Include task cards or activity sheets with guided questions and prompts to scaffold students' learning and encourage independent exploration at each station.
- Rotate students through the measurement and data centers in small groups, allowing them to collaborate, share insights, and learn from one another's approaches.
- Encourage students to record their observations, measurements, and findings in their notebooks or on designated recording sheets to document their learning journey.
- Facilitate discussions and reflections at the end of the center activity, where students can share their discoveries, challenges, and strategies for solving area and perimeter problems.
- Consider incorporating technology tools such as interactive apps or digital simulations to complement the hands-on experiences and provide additional opportunities for exploration and practice.
Real-Life Applications
Understanding the real-life applications of area and perimeter is essential for students to appreciate the relevance of these mathematical concepts in everyday scenarios. Here are some examples:
- Calculate the area of a room in a house to determine the amount of flooring needed for renovation or installation.
- Determine the perimeter of a garden or backyard to plan the placement of fencing or landscaping features.
- Estimate the area of a field or sports field to allocate resources for maintenance, such as seeding or irrigation.
- Measure the perimeter of a parcel of land to assess property boundaries and plan construction or development projects.
- Calculate the area of a painting or mural to determine the amount of paint needed and estimate project costs.
- Design packaging for products by considering the dimensions and surface area required to enclose and protect the items.
- Plan seating arrangements in auditoriums or event venues by calculating the area and perimeter of seating sections.
- Estimate the area of a floor plan or blueprint to optimize space utilization in architectural and interior design projects.
- Determine the perimeter of a playground or recreational area to ensure safety and security measures are in place.
- Calculate the area of a farm field to optimize crop planting and yield management strategies.

Student Engagement and Creativity
Engaging students in area and perimeter projects sparks their creativity and fosters a deeper understanding of mathematical concepts. Here's how to promote student engagement and creativity:
- Encourage students to choose their own real-life scenarios or design challenges for area and perimeter projects, allowing them to explore topics that interest them.
- Provide opportunities for hands-on exploration and experimentation with various materials and manipulatives, giving students the freedom to express their ideas and solutions creatively.
- Offer open-ended tasks and problem-solving challenges that require students to apply their knowledge of area and perimeter in novel ways, encouraging critical thinking and innovation.
- Integrate interdisciplinary connections by incorporating art, design, and technology elements into area and perimeter projects, inspiring students to approach mathematical problems from different perspectives.
- Facilitate collaborative group projects where students can collaborate, share ideas, and learn from one another's strengths and perspectives, fostering a sense of teamwork and community.
- Provide opportunities for reflection and self-assessment, allowing students to evaluate their own progress, identify areas for improvement, and celebrate their achievements.
- Showcase student work through presentations, displays, or digital portfolios, celebrating their creativity and accomplishments while providing inspiration for their peers.
Project-Based Learning (PBL)
Project-Based Learning (PBL) offers a holistic approach to teaching area and perimeter, allowing students to apply their knowledge and skills to real-world challenges. Here's how to implement PBL effectively:
- Introduce students to a real-life problem or design challenge that requires them to use area and perimeter concepts to find solutions.
- Provide students with the opportunity to explore the problem through research, investigation, and hands-on experimentation, encouraging them to ask questions and think critically about possible solutions.
- Guide students in planning and designing their projects, helping them set goals, define criteria for success, and develop a plan of action.
- Encourage collaboration and teamwork as students work together to brainstorm ideas, share expertise, and solve problems collectively.
- Provide ongoing support and feedback throughout the project, offering guidance and resources as needed while allowing students to take ownership of their learning.
- Facilitate opportunities for students to present their projects to their peers, teachers, or external stakeholders, showcasing their creativity, problem-solving skills, and mathematical understanding.
- Encourage reflection and self-assessment at the conclusion of the project, prompting students to evaluate their learning process, identify strengths and areas for improvement, and celebrate their achievements.
Resources and Materials
Utilizing a variety of resources and materials is key to creating engaging and effective area and perimeter projects. Here are some valuable resources and materials to consider:
- Math manipulatives such as pattern blocks, tangrams, geoboards, and snap cubes to help students visualize and manipulate geometric shapes.
- Measuring tools including rulers, tape measures, yardsticks, and measuring tapes to facilitate accurate measurements of length, width, and height.
- Graph paper and grid paper for students to sketch and draw geometric figures, allowing them to practice measuring and calculating area and perimeter.
- Everyday objects like paper clips, coins, buttons, and tiles for hands-on exploration of area and perimeter concepts in real-life contexts.
- Technology resources such as interactive apps, digital simulations, and online manipulatives to enhance virtual learning experiences and provide additional practice.
- Task cards, activity sheets, and worksheets with a variety of problems and scenarios for students to practice applying area and perimeter concepts.
- Books, videos, and multimedia resources that introduce area and perimeter concepts in engaging and accessible ways, catering to different learning styles.
- Project-based learning resources and curriculum guides that offer ideas, lesson plans, and assessment tools for integrating area and perimeter into broader interdisciplinary projects.
Evaluation and Reflection
After completing the area and perimeter project, it's essential to assess students' understanding and reflect on the learning process. Here are some steps for evaluation and reflection:
- Review the project objectives: Reflect on the initial goals set for the project. Did students achieve these objectives?
- Assess student work: Examine the projects, assignments, and assessments completed by students. Look for evidence of understanding of area and perimeter concepts.
- Use rubrics: Utilize rubrics to evaluate students' performance. Assess their ability to calculate area and perimeter accurately, as well as their problem-solving and critical thinking skills.
- Provide feedback: Offer constructive feedback to students, highlighting areas of strength and areas for improvement.
- Encourage self-assessment: Prompt students to reflect on their own learning process. Ask them to identify what they've learned, challenges they faced, and strategies they used to overcome difficulties.
- Facilitate peer review: Arrange peer review sessions where students can share and discuss their projects with classmates. Encourage constructive feedback and collaboration.
- Reflect on teaching strategies: Consider the effectiveness of the teaching methods and resources used during the project. Identify any adjustments or improvements for future lessons.
- Celebrate achievements: Recognize and celebrate students' achievements and progress in understanding area and perimeter concepts. This could be through certificates, presentations, or displays of their work.
Xem video về Mô hình làm việc về công thức chu vi và diện tích - Mô hình làm việc toán - Tự làm | Craftpiller để hiểu cách áp dụng diện tích và chu vi trong thực tế.
Video: Maths Perimeter and Area Formulas Working Model - Maths TLM - DIY | Craftpiller
READ MORE:
Xem video về Mô hình diện tích và chu vi cho toán học | Mô hình Toán học cho B.ed để hiểu cách áp dụng diện tích và chu vi trong thực tế.
Video: Mô hình diện tích và chu vi cho toán học | Mô hình Toán học cho B.ed